Frequently Asked Questions. Here are some common questions about the St Stephens web site (Teachers version).
Login
How do I login to the website?
The St Stephens website login is here.
This is a WordPress website and can be accessed from a browser or via a WordPress app (iOS and Android versions are both available).
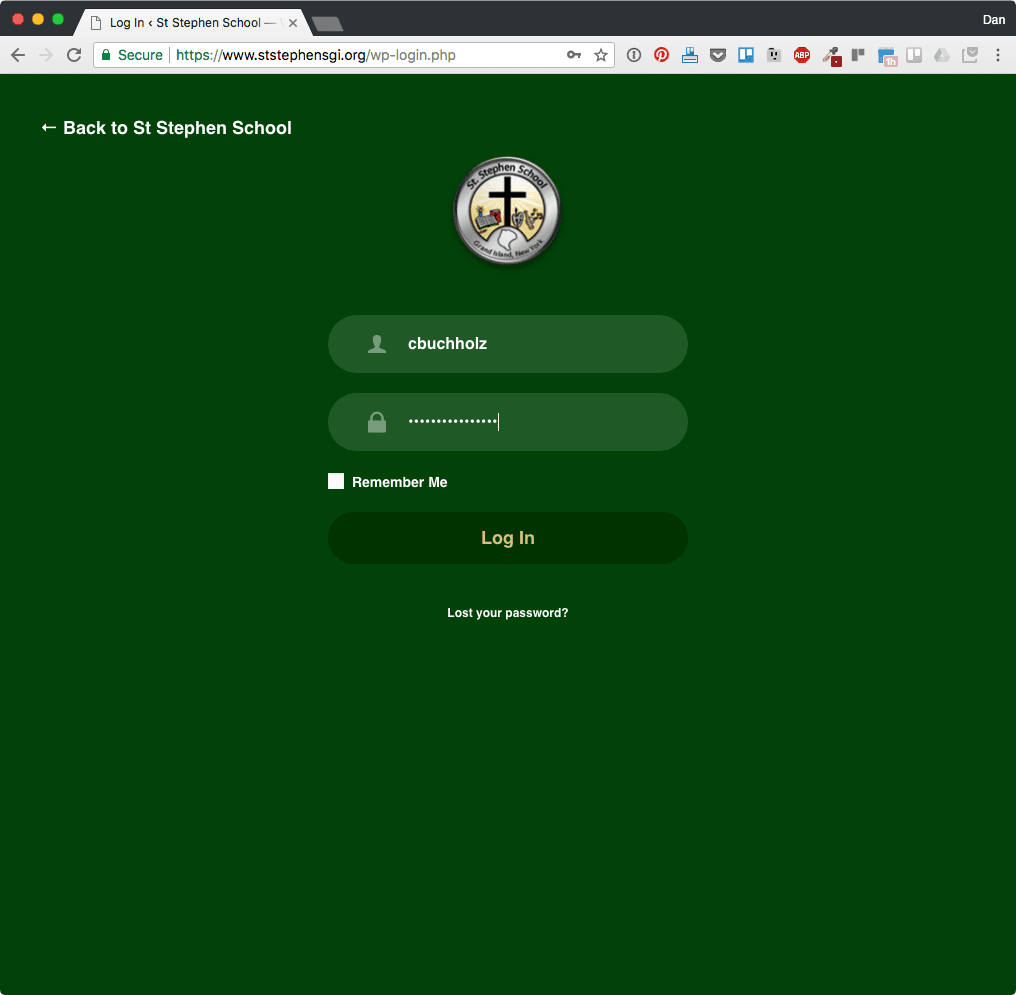
The login screen should look like this:

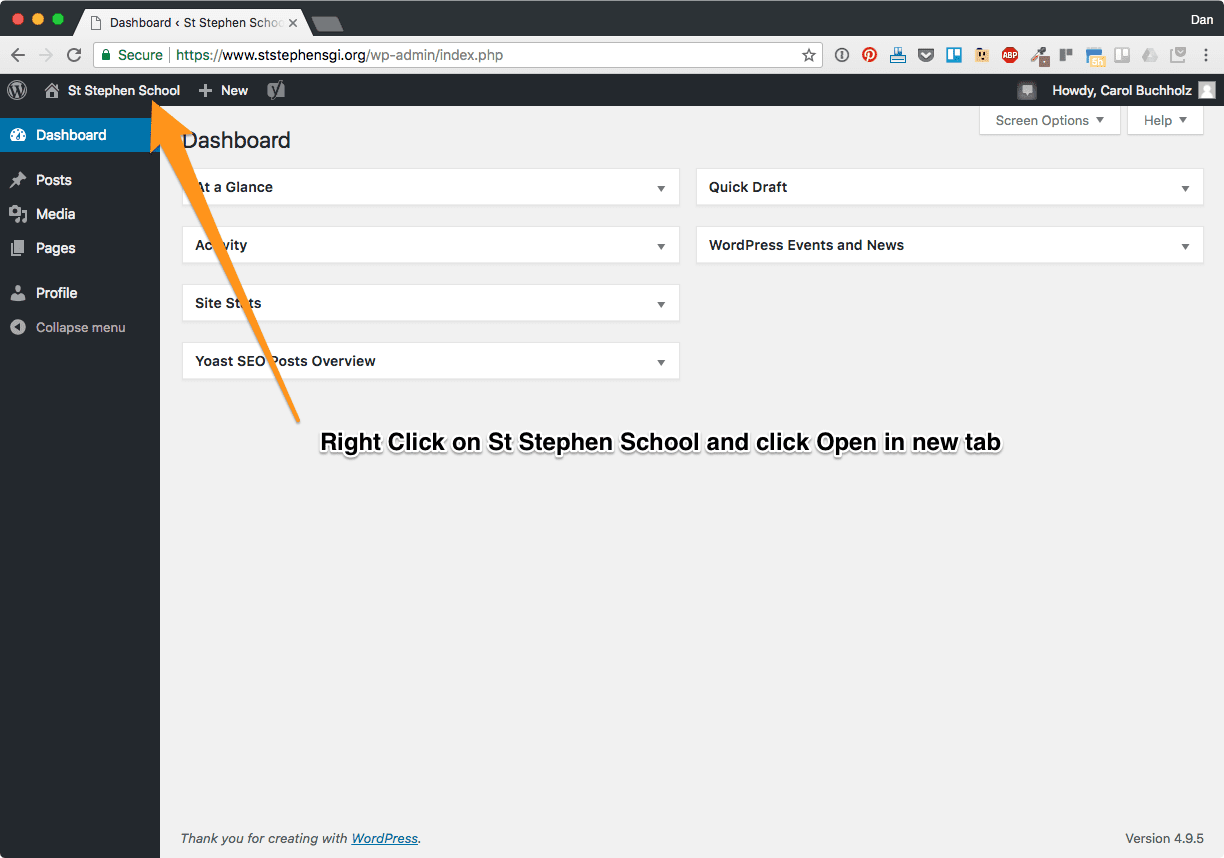
Once you are logged in, you’ll be routed to the WordPress Dashboard. It should look like this:

How do I set up the app (iPhone)?
These examples will show images of the iOS version of the WordPress app (on an iPhone), it is assumed that the Android version will be similar.
- Download the app onto your device (apps link: click here)
- Open the app, you’ll be greeted with a welcome page:

- Click Log in (to an existing site) and you’ll be presented with the initial screen. Click on the “Log into you site…” text at the bottom of the screen. We are NOT using WordPress.com, this is a different service! (DO NOT enter your email address!)


- Enter the web site url into the WordPress site name: (before image)
- after image:
- Click Next
- Enter your userid and password on the next screen
- Viola! You should be setup with the app!


Access
What do I have access to?
Teachers can post to their class website. Your login would give you full access to put up as many posts as you would like.
They can be summary/informational posts – like a simple “hello” or “we need supplies”, or they can be weekly updates, if you’d prefer.
The teacher profiles are set up by the admins, teachers don’t have access to update those pages. (The profile is what you get when you click on the teacher image/name in the left hand column of the teacher’s page.)
You have control over what shows up on your class page (right hand column on the teacher’s page).

How do I add to my class page?
How do I add to my class page?
We are using WordPress categories to control the posts and put it on it’s appropriate page.
Each teacher has a category that they have access (and are limited) to. They are last name-firstname. Everytime a post is entered AND has the category set, it will appear on the appropriate class page.
Note: (We’ll use Miss Cacciatore throughout this to showcase the steps.)
To add a Post, click on Posts in the dashboard (Note that Miss Cacciatore only can see her posts that she has “written”):

Click “Add New” to begin adding a new post.

As a minimum, add the title, text to the post body and click “Publish”. You can also add images, etc. by clicking on Media. The editor will default to a Word-like editor, including highlighting, alignment etc. If you are familiar with HTML, you can click on the “Text” editor (by the “Visual:” editor tab) and edit the HTML directly.
Note that once “published”, the post will immediately become available to the public.

Once published, the post will appear in the Posts page (in this case, automatically added to Miss Cacciatore’s default category).

The post will also automatically appear on the category’s page, in this case, Miss Cacciatore’s Class page.

How do I add an image to my class page?
We touched briefly on adding media above (in the add a post faq).
WordPress allows for images, video, and audio to be inserted into posts. We’ll look at two options.
- Inserting an image into a post.
- Adding a “Featured image” which will appear on the Class page list.
Inserting an image is fairly straightforward.
To add an image to an existing post, place your cursor where you want the image to appear and click on the Add Media button.

You’ll be taken to the Insert Media page, where you can choose from the existing images in the Media Library OR you can drop and drag onto the Media Library for a new image OR you can click on the Upload Files tab to upload new images.

Once uploaded to the Media Library, you can select an image. Once selected, hit the Insert into Post button. This will insert the image into the post.

This will save the image into your edited post. Note the post has not been saved yet. To save the post, click the Update button.

This will save the post. When viewed the image is saved to the post detail only.
Note:When the post summary is viewed on the class list, the image is NOT visible. It is simply the text of the post (see below).

However, when we view the post detail (click on the post title), we DO see the image:

To add an image to the class list (we are limited to one image per post on the class list), we need to use the “Featured image” construct.
Click on the Featured Image URL and use the Media Library to select and set an image (it does NOT have to be the same image as you used in the post, although we are here…). Remember, you’ll have to click Update to save the post again.

Once we have added a Featured Image, we can now see the image on the Class page.
Note: You will NOT see the “Featured” image on the detail of the post. It only appears on the Class Page.

How do I add a PDF to a page that uses PDFs to drive the page (ex: STREAM)
Reminder: WordPress allows for images, video, and audio to be inserted into posts.
We touched briefly on adding media above (in the add a post faq), with a WordPress plugin, PDFs can be treated as media files.
To do so:
Login to the website: (http://ststephensgi.org/login)
You’ll be directed to the WordPress Dashboard. For ease of finding the “correct” page to edit, we’ll open a new tab and navigate to the page we want to edit.
In the newly opened tab, navigate to the page that you wish to edit. Click on Edit Page to open the page editor.

In this example, we’ll be replacing an existing PDF file. (The STREAM page has the identifier “STREAM PDF” on the pertinent area.)
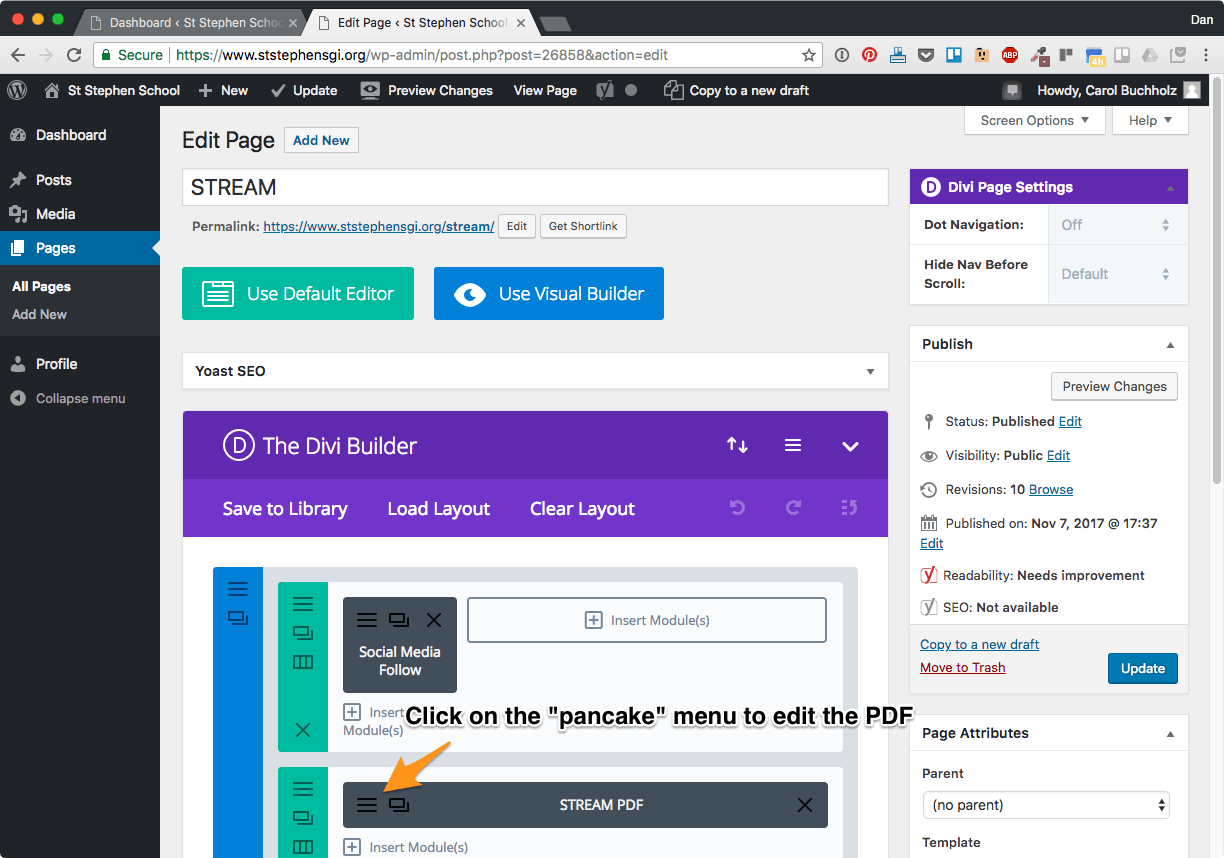
A “Text Module Settings” window will open. There will be code to insert the current PDF file already there. We want to replace that with a pointer to a newly created PDF. Click on the ADD MEDIA button (PDFs are considered media).

Upload the new PDF to the website.

Once the new PDF uploads, You’ll be taken to the Media library, with the uploaded PDF selected. Click Insert into page.

The Insert will put a URL to the uploaded PDF. We now need to remove the OLD PDF, unless you want multiple PDF files on the page.
Note: The uploader uses a year month identifier in the path to the PDF, so it’s easier to let WordPress do the work (vs. editing the path).

Click “Save & Exit” to Close Text Module window.

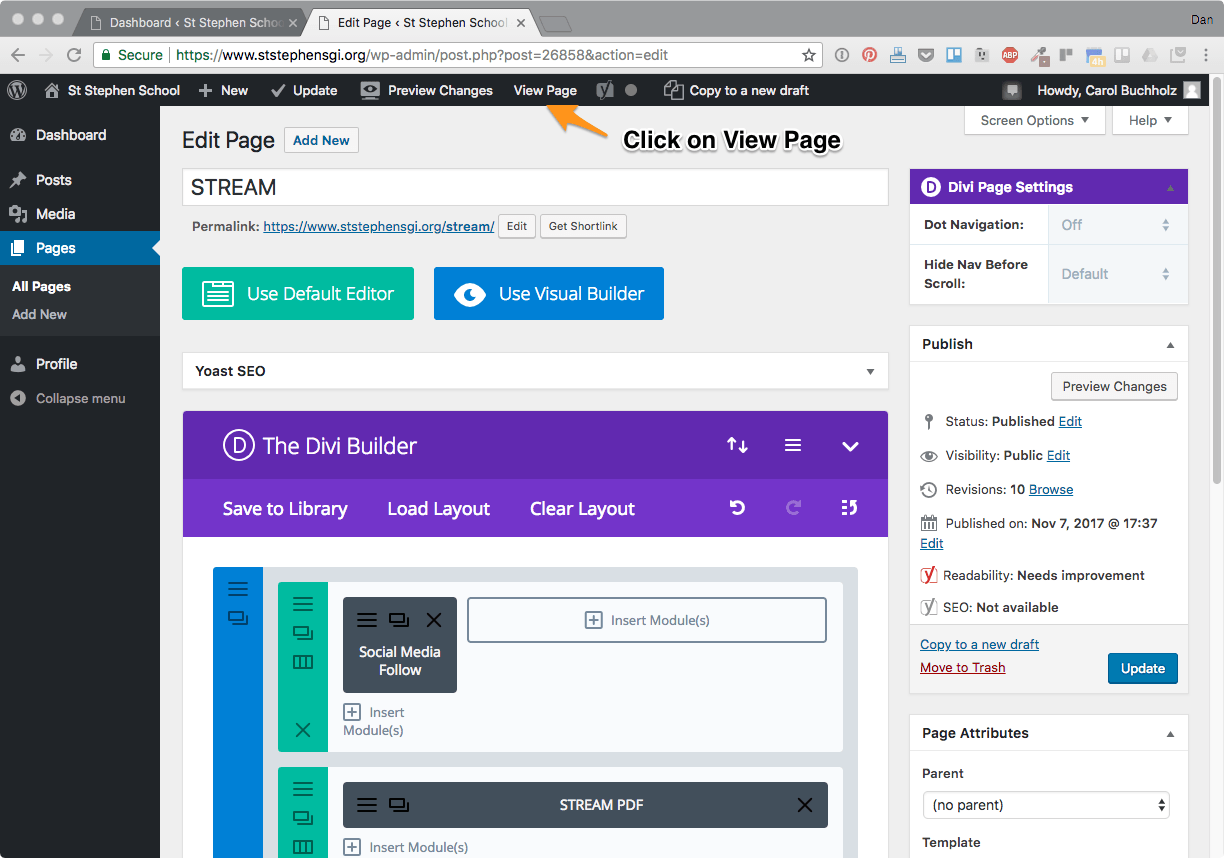
Almost done! We need to save the page. Click Update.

FINALLY, let’s double check the page, click on View Page.